Applying for a USA student visa can feel overwhelming, but breaking it down into clear steps makes it manageable. From choosing the right visa type to preparing for the interview, this guide walks you through everything you need to know. With the right preparation and mindset, you’ll increase your chances of success and take one step closer to studying in the U.S.
Key Takeaways
- Choose the Correct Visa Type: Most international students apply for an F-1 visa, designed specifically for academic studies. Make sure you meet all eligibility requirements before beginning your application.
- Secure Admission First: You must receive an acceptance letter from a SEVP-approved school before applying for a student visa. This is a mandatory step in the process.
- Complete the DS-160 Form: Fill out the online nonimmigrant visa application accurately. Double-check all details to avoid delays or denial due to errors.
- Pay the Visa Fee and Schedule an Interview: After submitting the DS-160, pay the SEVIS I-901 fee and the visa application fee. Then book your visa interview at a U.S. embassy or consulate.
- Prepare for the Visa Interview: Gather all required documents, practice common questions, and present yourself confidently. Your goal is to prove you’re a genuine student with clear intentions to return home.
- Maintain Valid Status After Arrival: Once in the U.S., follow your school’s rules, maintain full-time enrollment, and keep your I-20 updated to stay in legal student status.
- Consider Alternative Pathways: If you’re not ready for a full degree, look into exchange visitor programs (J-1 visas) or short-term study options that may offer easier entry.
📑 Table of Contents
- Step by Step Guide to USA Student Visa Application
- 1. Understand the Different Types of U.S. Student Visas
- 2. Get Accepted by a SEVP-Approved School
- 3. Complete the DS-160 Form Online
- 4. Pay the Visa Application Fees
- 5. Schedule and Attend Your Visa Interview
- 6. After the Interview: Wait and Prepare for Travel
- 7. Maintain Your Student Status After Arrival
- Common Mistakes to Avoid
- Final Thoughts: Your Journey Begins Now
- FAQs
Step by Step Guide to USA Student Visa Application
Introduction: Why the U.S. Is Still the Top Destination for Students
Thousands of students from around the world dream of studying in the United States. From world-class universities to cutting-edge research opportunities, the U.S. offers unmatched academic excellence. But before you pack your bags and head to New York or San Francisco, you’ll need a U.S. student visa. While the process may seem intimidating, breaking it down into manageable steps can make all the difference.
This guide walks you through every stage of the USA student visa application process—from understanding visa types to preparing for your interview. Whether you’re applying for the first time or trying to re-enter the country, this step-by-step guide will help you navigate the system with confidence. Let’s dive in.
1. Understand the Different Types of U.S. Student Visas
F-1 Visa: The Most Common Choice
The F-1 visa is the most sought-after student visa for international students pursuing academic studies or language training programs at SEVP-approved schools. To qualify, you must:
Visual guide about Step by Step Guide to Usa Student Visa Application
Image source: onlinevisaguide.com
- Be enrolled full-time at a recognized institution
- Intend to return home after your studies
- Have sufficient funds to cover tuition and living expenses
This visa allows you to stay in the U.S. for the duration of your program plus a short grace period. You can also work on-campus and, under certain conditions, off-campus through Optional Practical Training (OPT).
J-1 Visa: For Exchange Students
The J-1 visa is ideal for students participating in approved exchange programs, such as research, teaching, or cultural exchange. It’s often used by students from countries with the U.S. State Department’s Exchange Visitor Program. Unlike the F-1, the J-1 may require a two-year home-country physical presence after program completion.
Which One Is Right for You?
If you’re enrolling in a degree program at a university or college, the F-1 is your best bet. If your program is short-term or part of an exchange initiative, the J-1 might be more suitable. Always check with your school’s international student office for guidance.
2. Get Accepted by a SEVP-Approved School
Why School Approval Matters
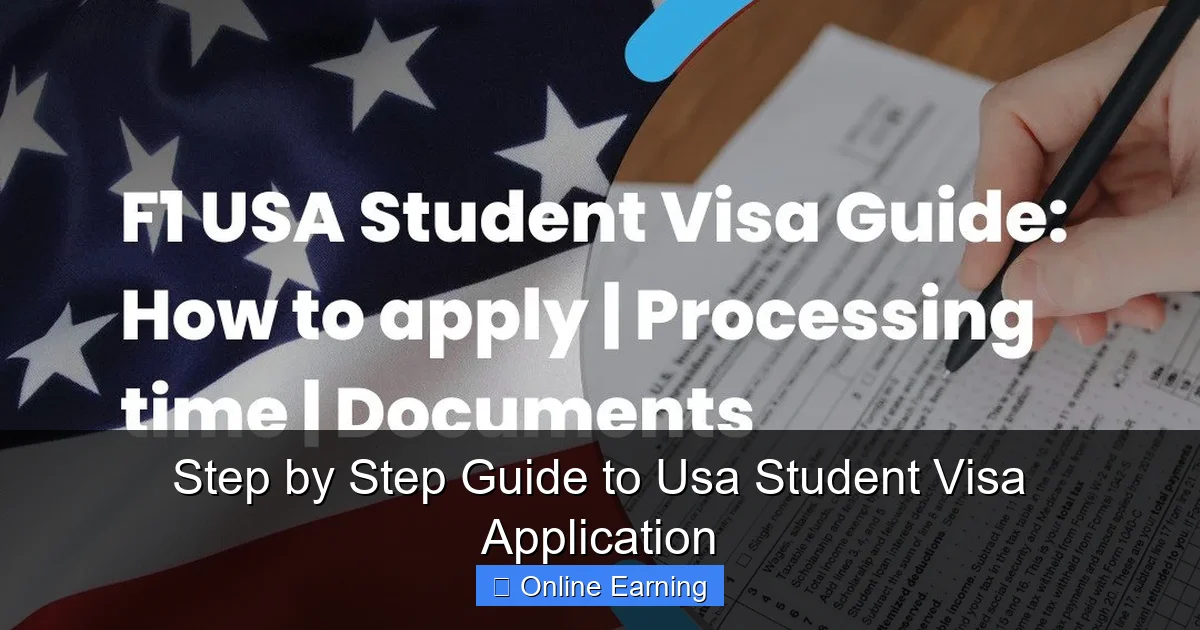
You can’t apply for a student visa without first being accepted by a school approved by the Student and Exchange Visitor Program (SEVP). These schools are monitored by the U.S. government to ensure they meet educational standards.
Visual guide about Step by Step Guide to Usa Student Visa Application
Image source: swecvisaconsultant.com
Steps to Secure Admission
- Research and Apply: Choose a school that fits your academic and career goals. Submit applications early—deadlines can be as early as 12 months before the start of classes.
- Receive an Acceptance Letter: Once accepted, the school will issue a Form I-20 (for F-1 students) or DS-2019 (for J-1 students).
- Pay the SEVIS Fee: Before your visa interview, you must pay the SEVIS I-901 fee. This fee funds the SEVIS system and is required for all F and J visa applicants.
Pro Tip: Don’t apply to just any school. Make sure the institution is listed on the SEVP’s approved schools website. Applying to an unapproved school could disqualify you from getting a visa.
3. Complete the DS-160 Form Online
What Is the DS-160?
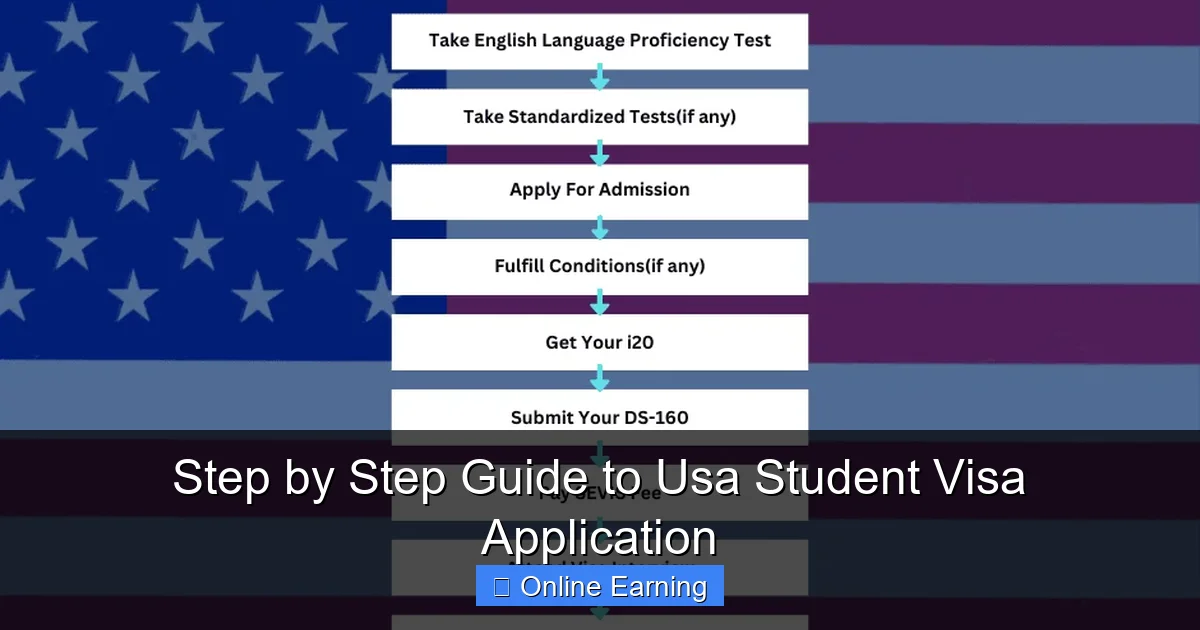
The DS-160 is the official online application form for a nonimmigrant U.S. visa. It’s the first step in the visa application process and must be completed before your interview.
Visual guide about Step by Step Guide to Usa Student Visa Application
Image source: swecvisaconsultant.com
How to Fill It Out
- Go to the Consular Electronic Application Center (CEAC) website.
- Click “Start New Application” and select your country of residence.
- Fill in personal, academic, and travel information. Be honest and consistent—any discrepancies could lead to denial.
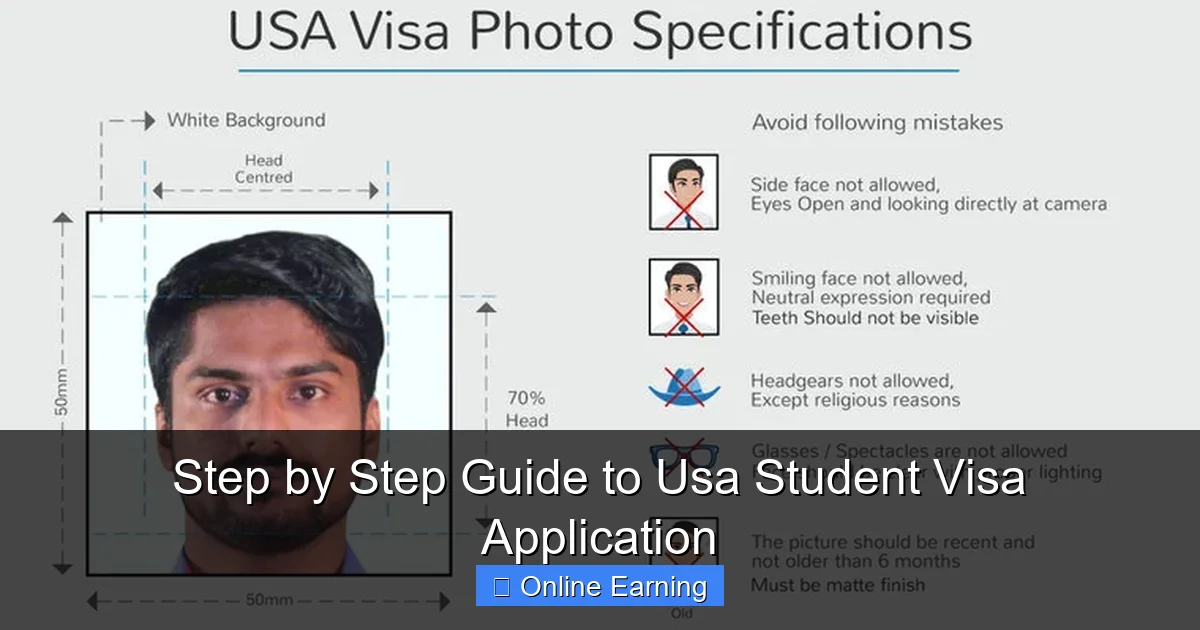
- Upload a recent photo that meets U.S. visa photo requirements.
- Review and submit. You’ll receive a confirmation page with a barcode—print it and bring it to your interview.
Common Mistakes to Avoid: Using nicknames, skipping questions, or providing incomplete education history. Take your time and double-check every field.
4. Pay the Visa Application Fees
Two Fees You’ll Need to Pay
- SEVIS I-901 Fee: Paid to the SEVP. Required for F and J visa applicants. As of 2024, the fee is $350.
- MRV Fee (Visa Application Fee): Paid to the U.S. embassy or consulate. The amount varies by country but is typically $160 for F-1 students.
Payment Tips
- Pay the SEVIS fee before scheduling your visa interview.
- Use the official SEVP payment portal: https://www.ice.gov/sevis/i901
- Keep the receipt as proof of payment. You’ll need it during your interview.
Note: Fees are non-refundable, even if your visa is denied. Plan accordingly and don’t delay payments.
5. Schedule and Attend Your Visa Interview
Where and When to Schedule
After completing the DS-160 and paying fees, log into the U.S. embassy or consulate’s visa appointment system in your country. Choose a date and time that works for you. Interview wait times vary—some countries have months-long delays, so plan ahead.
What to Bring to the Interview
- Printed DS-160 confirmation page
- Valid passport
- I-20 or DS-2019 form
- SEVIS fee receipt
- Visa application fee receipt
- Academic documents (transcripts, diplomas, test scores)
- Proof of financial support (bank statements, affidavits)
- Evidence of ties to your home country (job offer, property, family)
What to Expect During the Interview
The consular officer will ask questions about:
- Your academic goals and program of study
- Why you chose the U.S. and not your home country
- Your financial situation and funding sources
- Your plans after graduation
Sample Question: “What will you do after you finish your studies?”
Sample Answer: “I plan to return to my home country to work in the tech industry. My degree in computer science will help me contribute to local innovation and bridge the digital skills gap in my region.”
Tips for a Successful Interview
- Dress professionally and arrive early.
- Speak clearly and confidently.
- Be honest—never exaggerate or lie.
- Show genuine interest in your field of study.
- Emphasize your intent to return home.
6. After the Interview: Wait and Prepare for Travel
What Happens Next?
If approved, your passport will be returned with the visa stapled inside. Processing can take a few days to a few weeks, depending on the embassy.
When You Receive Your Visa
- Check the visa details carefully—name, photo, expiration date, and class of admission.
- If there’s an error, contact the embassy immediately.
- Note the “Admit Until Date”—this is how long you can stay in the U.S. upon entry.
Prepare for Your Departure
- Book your flight after receiving your visa.
- Arrive in the U.S. no earlier than 30 days before your program start date (I-20 lists this date).
- Bring all original documents, including your I-20.
- Expect to show your I-20 and visa at the port of entry to a U.S. Customs and Border Protection (CBP) officer.
7. Maintain Your Student Status After Arrival
Rules to Follow
- Enroll full-time each semester.
- Notify your Designated School Official (DSO) of any address changes or academic issues.
- Maintain a valid passport and visa.
- Avoid unauthorized work unless approved by your DSO.
Optional Practical Training (OPT)
F-1 students can apply for OPT to gain real-world experience in their field. There are two types:
- Pre-Completion OPT: Before graduation (limited hours).
- Post-Completion OPT: After graduation (up to 12 months, extendable to 24 months in STEM fields).
Apply through your DSO at least 90 days before your desired start date.
Common Mistakes to Avoid
Not Proving Strong Ties to Home Country
Consular officers worry that students will overstay their visas. Show proof of employment, family, property, or future plans that tie you to your home country.
Insufficient Financial Proof
Bring recent bank statements, sponsor letters, and tax returns. The U.S. government wants to ensure you can support yourself without working illegally.
Applying Too Late
Start early. Visa appointments can take weeks or months. Don’t wait until the last minute.
Ignoring the I-20
The I-20 is your legal document. Make sure it’s signed and up to date. A missing or expired I-20 can prevent you from entering the U.S.
Final Thoughts: Your Journey Begins Now
Applying for a USA student visa is a big step, but it’s one that opens the door to incredible opportunities. With careful planning, attention to detail, and a positive attitude, you can navigate the process successfully. Remember, the U.S. values international students—they bring diversity, innovation, and global perspectives to campuses across the country.
Take your time, follow the steps, and don’t hesitate to reach out to your school’s international student office for help. They’ve guided hundreds of students just like you through this journey.
Once you’re in the U.S., embrace the experience. Study hard, make friends, and explore everything your new home has to offer. The world is waiting for what you’ll bring to it.
FAQs
Can I apply for a U.S. student visa without an I-20?
No, you cannot. The I-20 is a mandatory document issued by your SEVP-approved school. It proves you’re eligible for an F-1 visa and must be submitted during your visa interview.
How long does it take to get a U.S. student visa?
The process can take 2 to 6 months from application to arrival. This includes school acceptance, DS-160 completion, fee payments, interview scheduling, and visa processing. Start early to avoid delays.
Can I work while on a student visa?
Yes, but only under specific conditions. F-1 students can work on-campus for up to 20 hours per week during the academic term and full-time during breaks. Off-campus work requires authorization from your DSO.
What if my visa is denied?
You can reapply, but you’ll need to address the reasons for denial. Common issues include insufficient financial proof, weak ties to your home country, or inconsistent answers. Consult with an immigration advisor if needed.
Can I bring my family with me?
Your spouse and unmarried children under 21 can apply for F-2 or J-2 dependent visas. They cannot work but can study part-time in the U.S.
Do I need to take the TOEFL or IELTS?
Most U.S. universities require proof of English proficiency. TOEFL or IELTS scores are commonly accepted. Check your school’s admission requirements for specific score expectations.
Frequently Asked Questions
Can I apply for a U.S. student visa without an I-20?
No, you cannot. The I-20 is a mandatory document issued by your SEVP-approved school. It proves you’re eligible for an F-1 visa and must be submitted during your visa interview.
How long does it take to get a U.S. student visa?
The process can take 2 to 6 months from application to arrival. This includes school acceptance, DS-160 completion, fee payments, interview scheduling, and visa processing. Start early to avoid delays.
Can I work while on a student visa?
Yes, but only under specific conditions. F-1 students can work on-campus for up to 20 hours per week during the academic term and full-time during breaks. Off-campus work requires authorization from your DSO.
What if my visa is denied?
You can reapply, but you’ll need to address the reasons for denial. Common issues include insufficient financial proof, weak ties to your home country, or inconsistent answers. Consult with an immigration advisor if needed.
Can I bring my family with me?
Your spouse and unmarried children under 21 can apply for F-2 or J-2 dependent visas. They cannot work but can study part-time in the U.S.
Do I need to take the TOEFL or IELTS?
Most U.S. universities require proof of English proficiency. TOEFL or IELTS scores are commonly accepted. Check your school’s admission requirements for specific score expectations.